
Setting up the NumXL Runtime Environment (NRE)
In this step, we'll describe the files and directory structure that form the NRE and then move on to configuration and licensing.
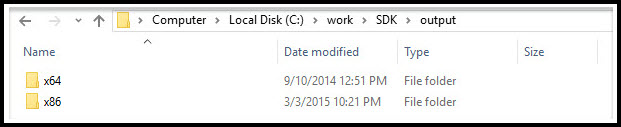
NumXL supports the 32-bit and 64-bit Microsoft Windows, so you will need to decide which platform you want to use: 32-bit, 64-bit or maybe both. The NRE has a separate set of files for each platform, so you will store each set in a separate folder.
For our illustration, we'll assume you are developing for both platforms, and have the following output structure:
1. Downloading the NRE
The latest NRE files exists online on our SDK support portal (http://sdk.numxl.com/help/article/link/downloads). Download the zipped file for each supported platform (e.g. 32-bit, 64-bit), and extract its contents into the directory structure above:
32-bit platform: For the 32-bit development, download the 32-bit NRE zipped file and extract those files and folders into the x86 output folder:
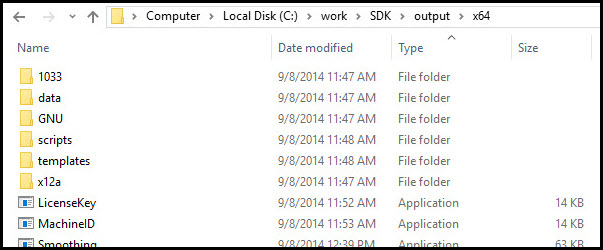
Please note that the NRE has numerous dependencies (i.e. 3rd party libraries/programs) and specific folder structure in the output file. The relative locations of those files and folders to each others is critical and must be preserved.
64-bit platform: For the x64 output folder, download the 64-bit NRE zipped file and extract those files and folders into the 64-bit version of the NRE.

The folder structure and many of the filenames in the 64-bit mimic those of the 32-bit platform, but they are very different files and they cannot be used interchangeably.
2. Configuring the NRE
The NRE includes a template configuration file (i.e. NumXL.conf). You should copy this file into a new file and name it <MyApp>.conf. The <MyApp> is a placeholder, and you should substitute it with your custom application name (e.g. demandPro, MyCustomApp, etc.).
Next, open the newly created configuration file (i.e. <MyApp>.conf) and examine its contents:
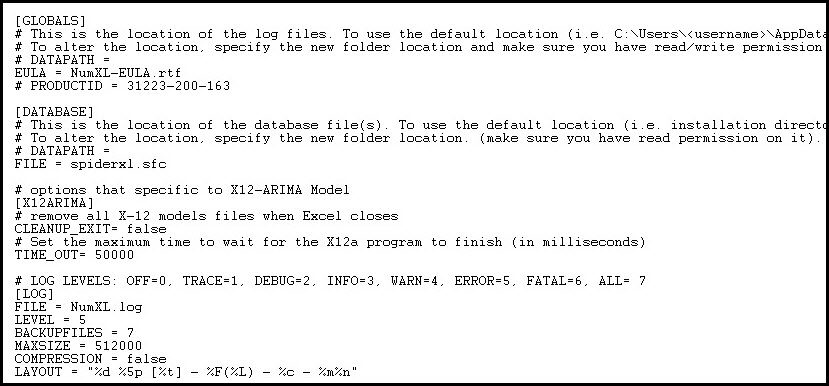
Note: the NRE components (i.e. DLLs) query this file for initialization (e.g. logging system, X12-ARIMA, and the data directory).
For our purposes now, we’ll leave this file unchanged, so please, save and close the file.
IMPORTANT: There is another configuration file called TestApp.conf . This file is used by the NRE utility programs (e.g. LicenseKey.exe) and should be left unchanged.
